
A Beginner’s Guide to Downhill Mountain Bike Parks
- Brad Christian

- Jun 30, 2025
- 7 min read
If you're new to the world of downhill mountain biking, visiting a bike park for the first time can feel both exhilarating and a bit intimidating. These purpose-built parks—once primarily found at ski resorts during the off-season—are now popping up in dedicated locations across the country, designed specifically for gravity-fueled riding. With professionally built trails, lift or shuttle access, and features ranging from beginner-friendly flow lines to technical descents, downhill bike parks are opening the sport to a wider audience than ever before.
Whether you're curious about what gear you need, how to navigate your first run, or what to expect from the park experience, this guide will help you plan your first downhill bike park experience with confidence.
Before you load up your bike and ride the gondola or shuttle up the mountain, there are a few key things to understand that will make your first trip smoother, safer—and a lot more fun. From choosing the right park and understanding trail difficulty ratings, to renting a proper downhill bike and wearing the right protective gear, a little preparation goes a long way. Many parks also offer lessons, guided rides, and rental packages that are perfect for first-timers.
If you already are an experienced trail rider your learning curve at a bike park will be shorter, but even if you are completely new to mountain biking, downhill parks are designed to accommodate all skill levels—just as long as you're ready to learn, adapt, and embrace the challenge of riding gravity-fed trails.
Which type of bike do I need?
If you're new to gravity-oriented riding, you'll quickly hear terms like enduro and downhill thrown around when it comes to bikes. Both are designed to handle steep descents and rugged terrain, but they serve slightly different purposes. Enduro bikes are built for versatility—they're capable of climbing and pedaling on long trail rides, but really shine on the descents. Downhill bikes, on the other hand, are purpose-built for one thing: going fast and staying in control on aggressive downhill trails. Understanding the differences between the two is key when planning a trip to a bike park, especially as more parks are designing trails that cater to both styles of riding.
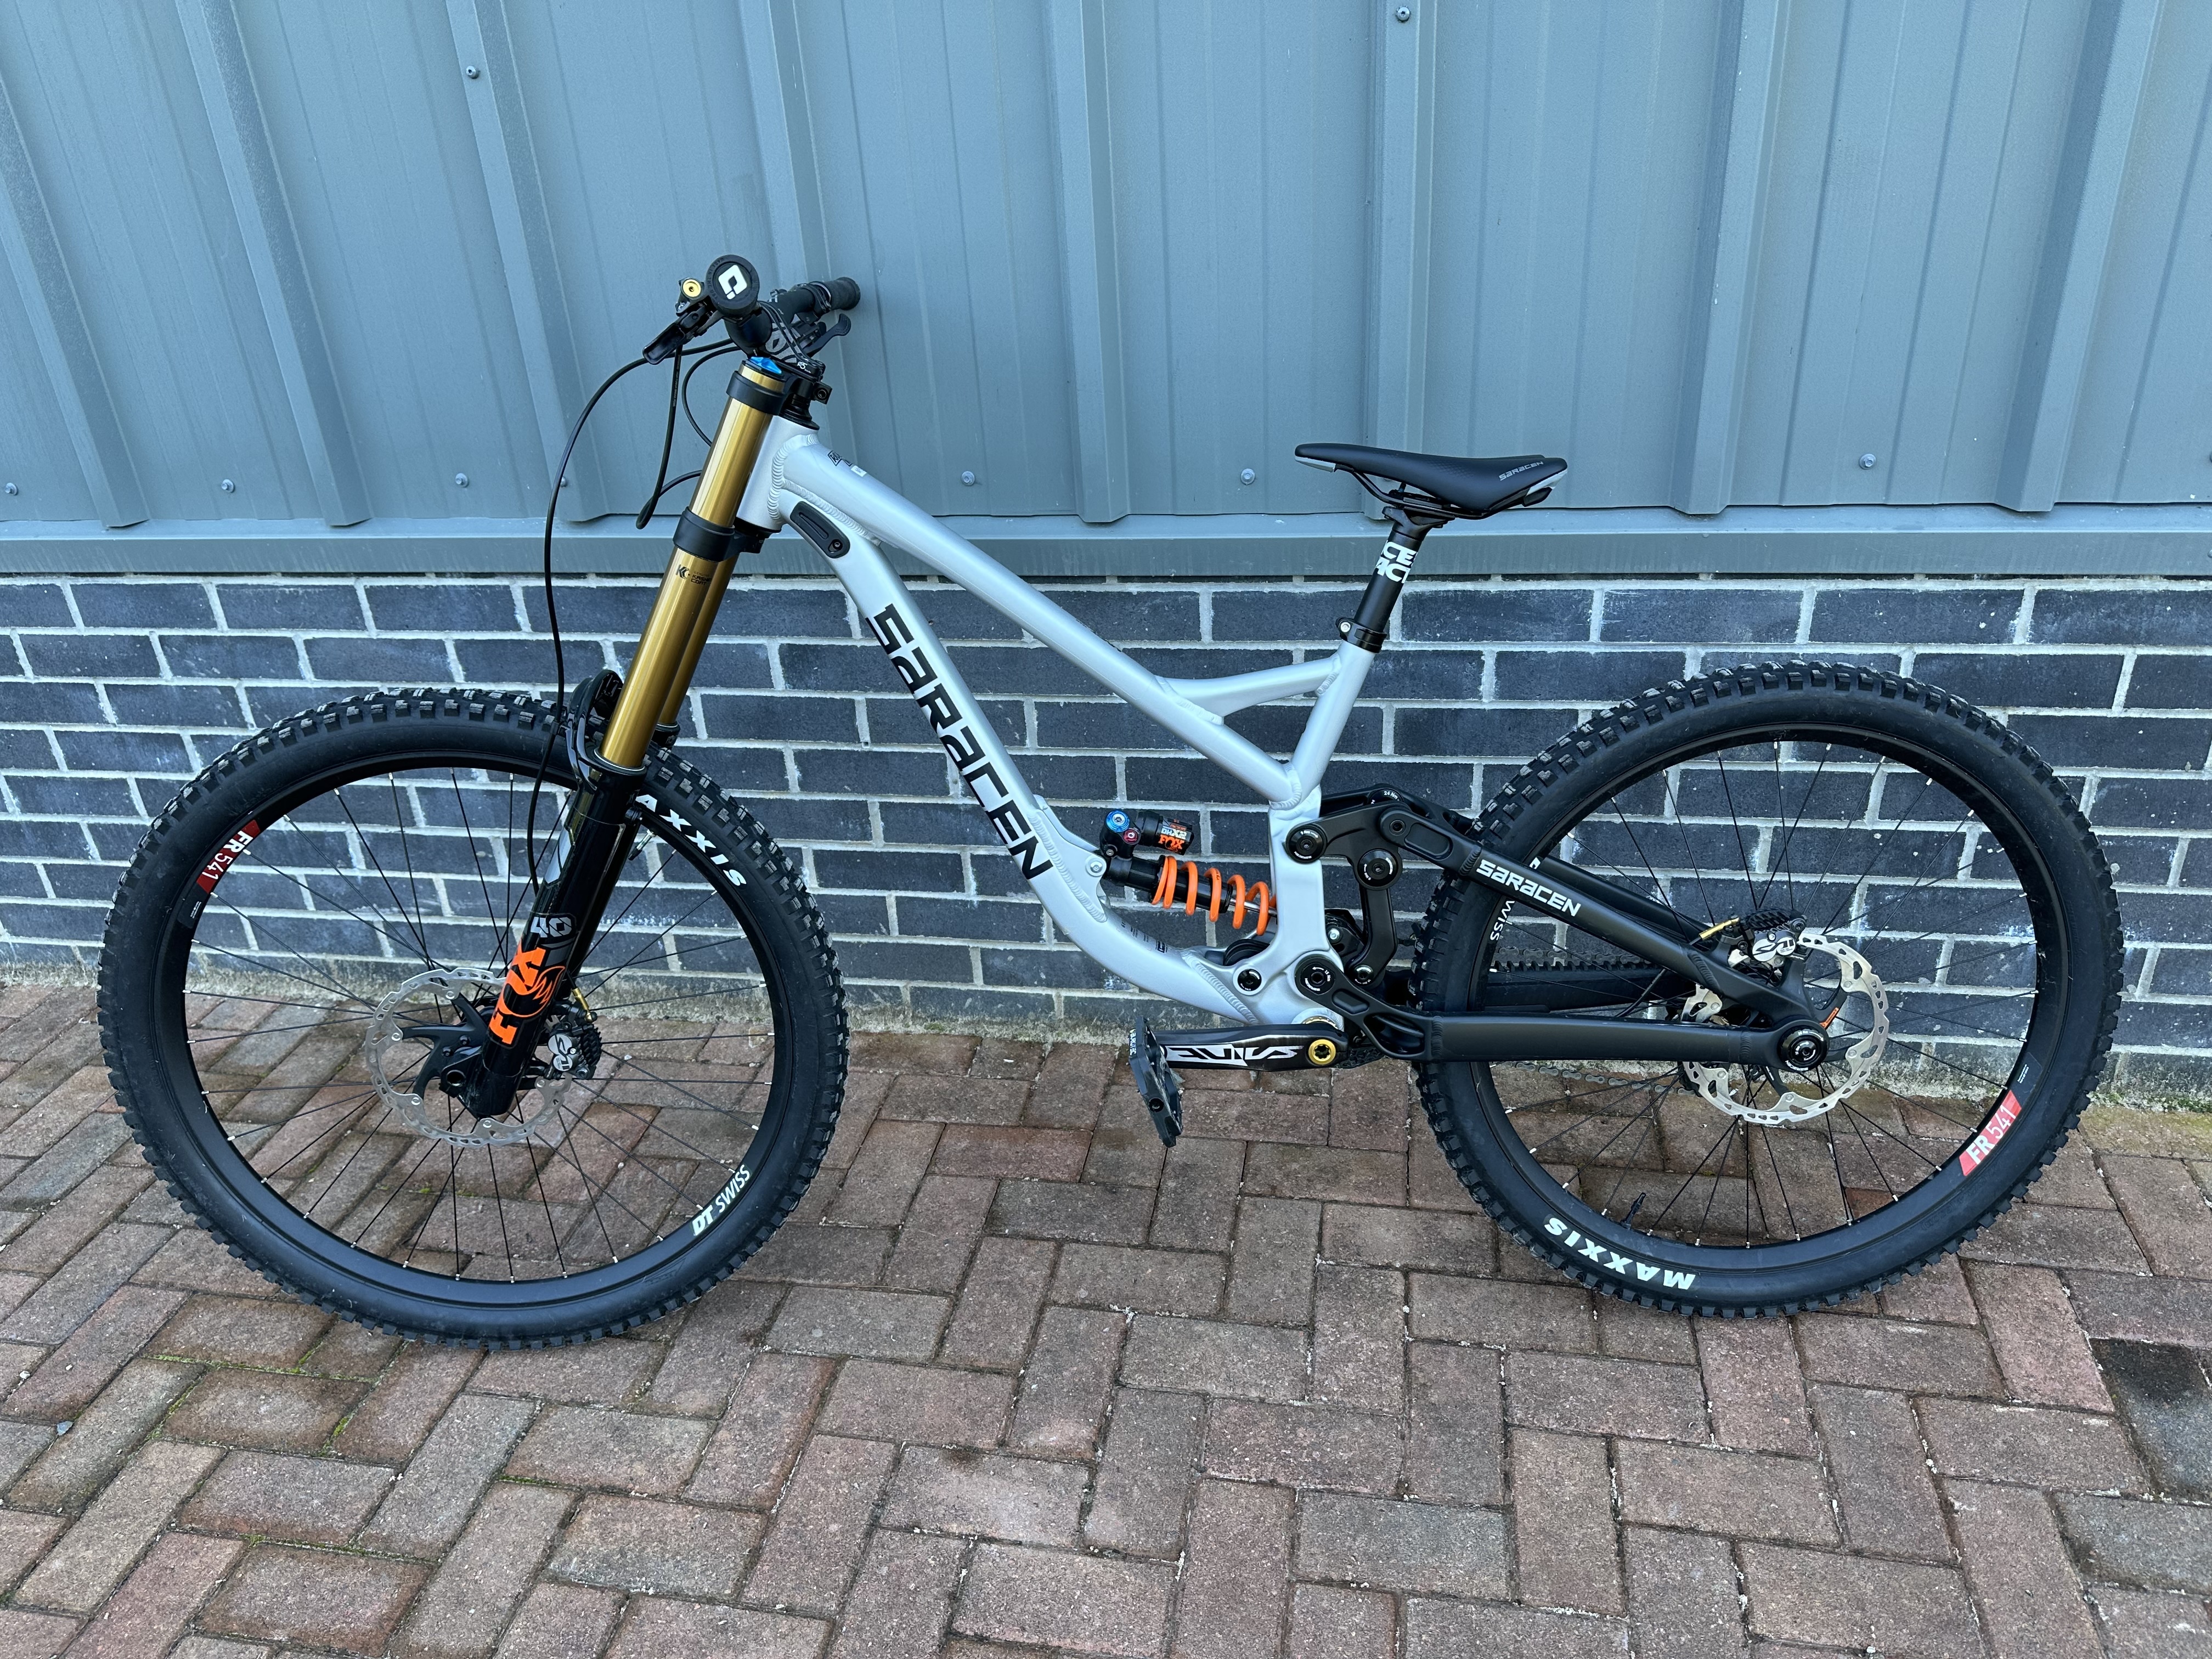
Technically, the two bike types differ in several key ways. Enduro bikes typically have 150–180mm of suspension travel, slacker head angles, and dropper seat posts to allow for quick seat height adjustments while riding. They’re designed to strike a balance between climbing efficiency and downhill performance. Downhill bikes, in contrast, are built with 200mm (or more) of suspension travel, dual-crown forks for added stability and strength, and heavy-duty frames that prioritize durability over weight savings. These bikes lack front shifting and dropper posts, and they're not intended for pedaling uphill—they’re built for steep, technical terrain and high-speed runs, normally on lift or shuttle-access trails.
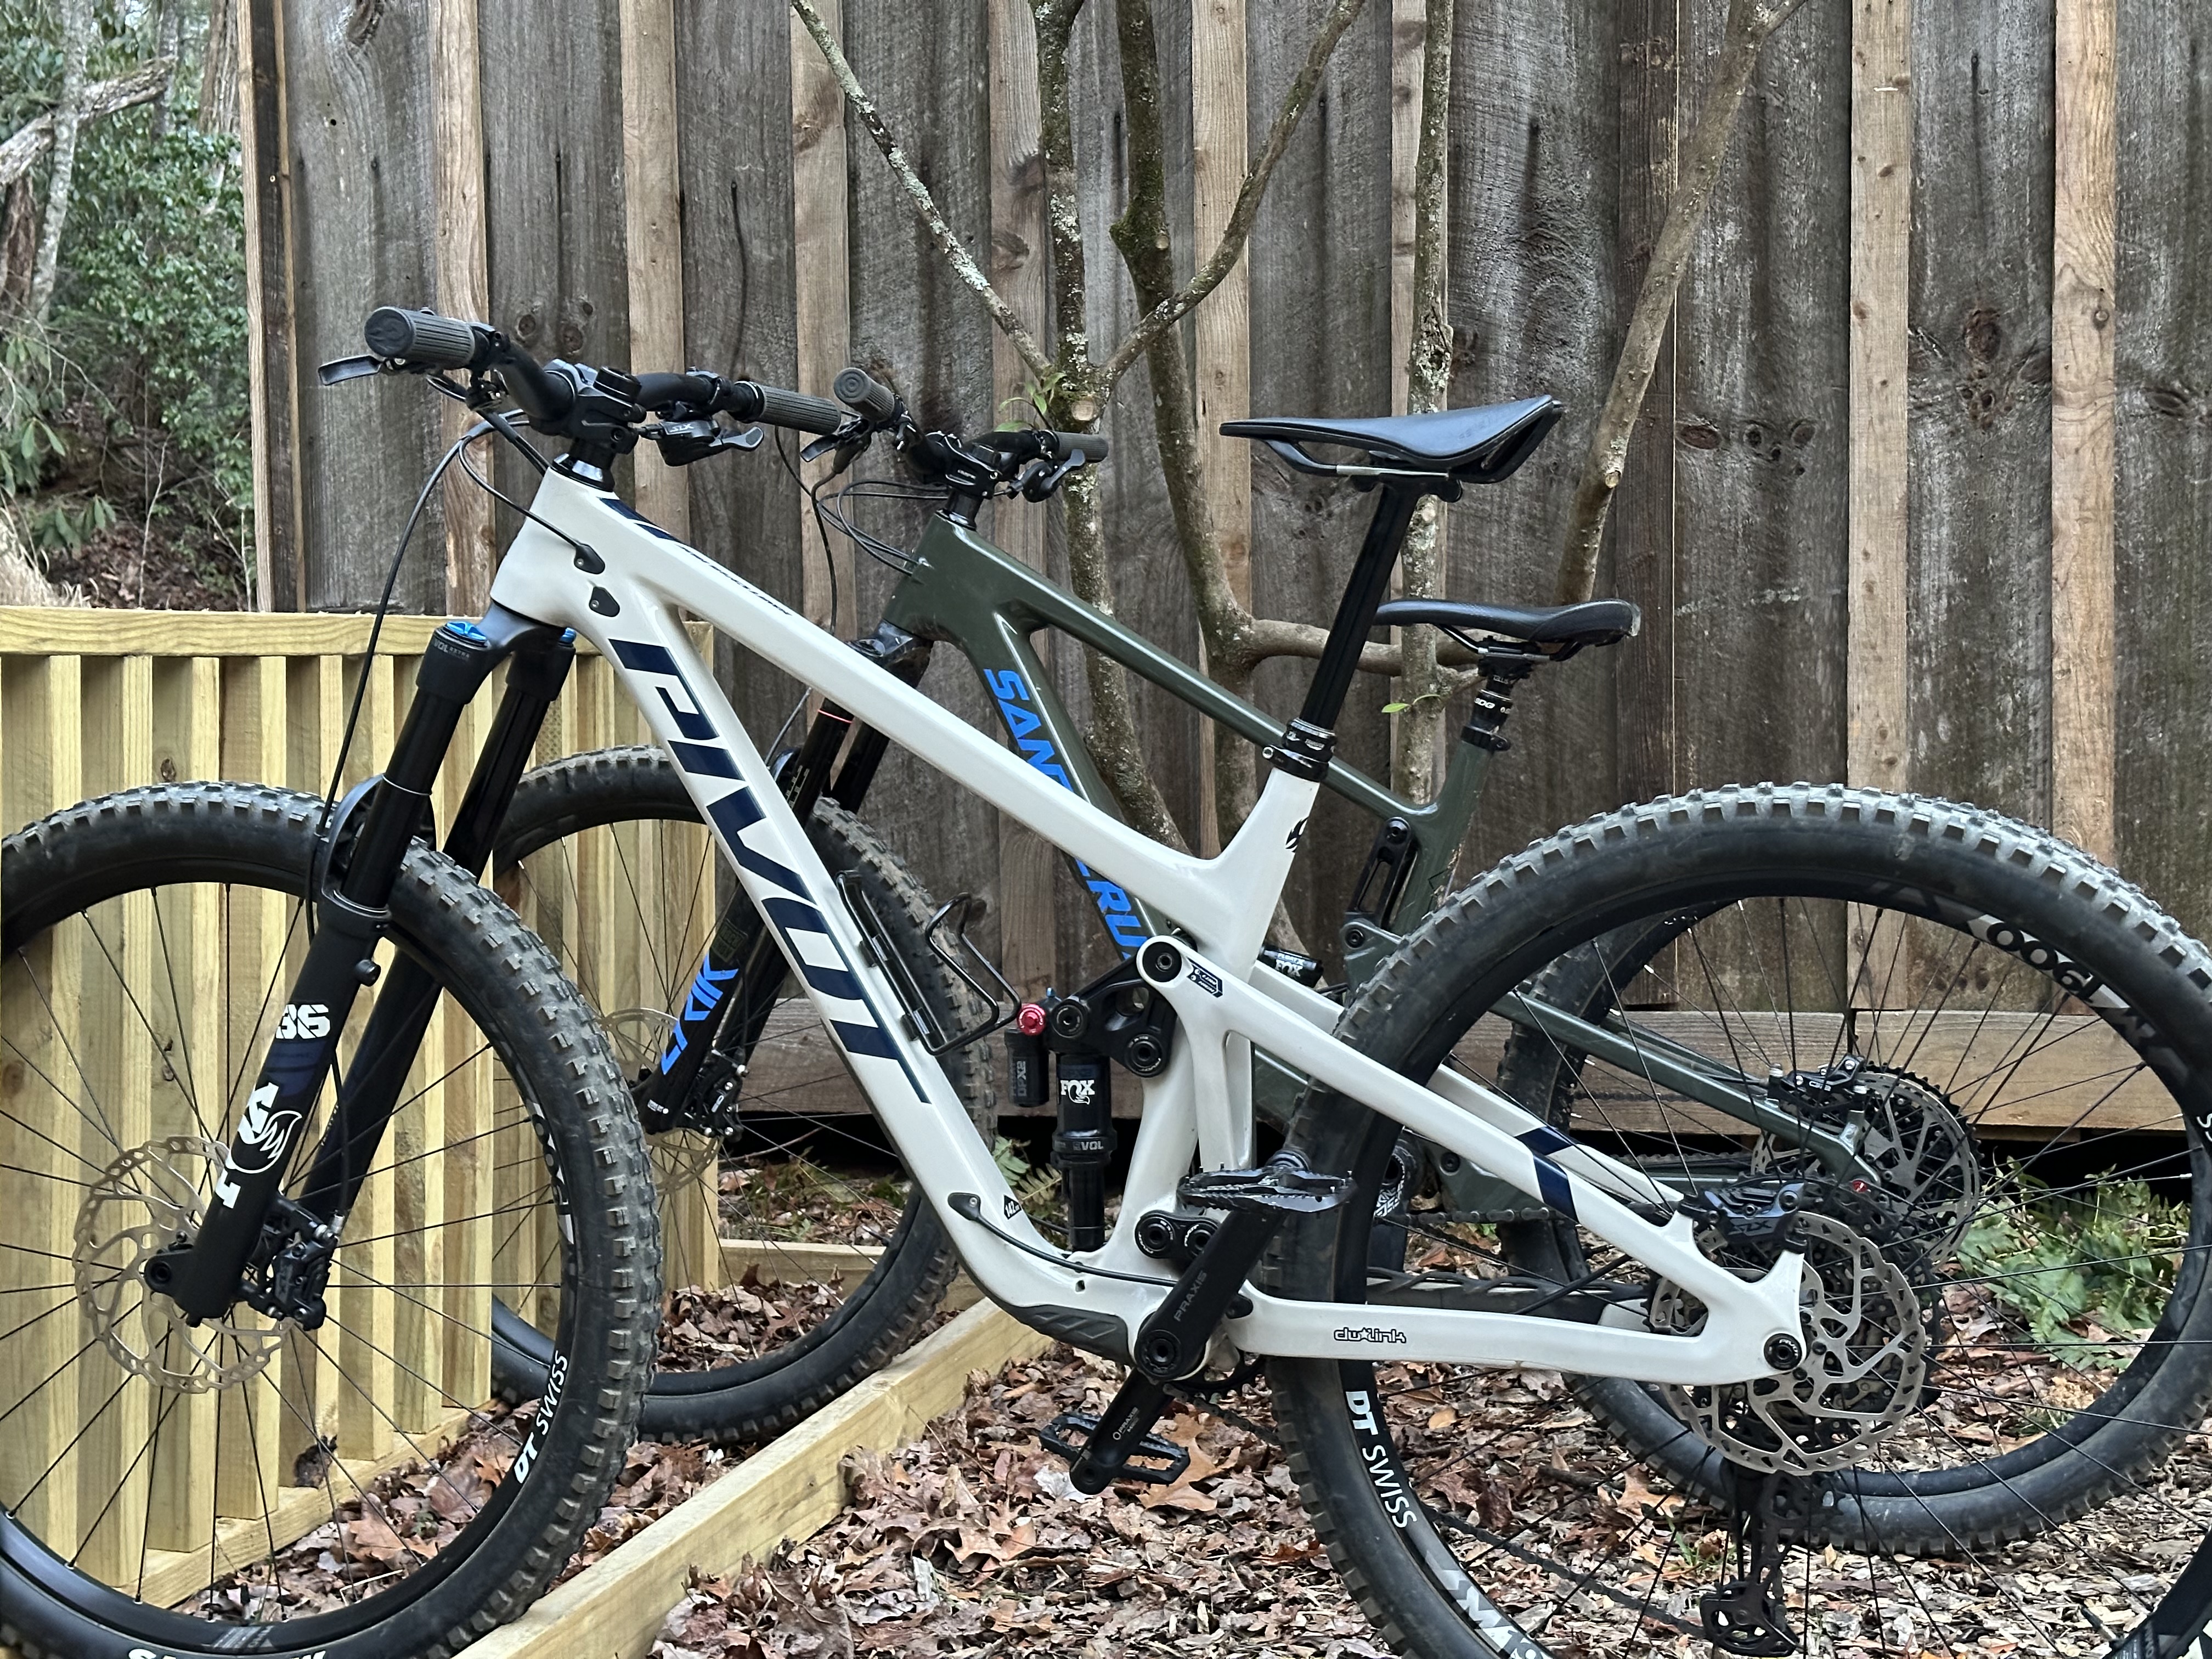
When it comes to riding in bike parks, both bikes have advantages depending on your goals and the terrain. Enduro bikes are ideal if you plan to mix bike park days with trail rides or if you're visiting a park with a variety of flowy trails, jump lines, and moderate technical features. Their ability to pedal efficiently and handle varied terrain makes them a great "do-it-all" option. Downhill bikes, however, truly come alive on rough, steep, and technical trails—the kind where speed, control, and stability are everything. If you're riding lift-accessed terrain with rock gardens, drops, and high-speed berms all day long, a downhill bike will give you the confidence and durability to push harder and ride longer.
Learn the basics first
Before heading to a bike park, it's important to build a foundation of core mountain biking skills to ensure both safety and enjoyment on the trails. Riders should be comfortable with basic body positioning, especially the neutral position, which help maintain balance and control on uneven terrain. Braking technique is critical—learning to modulate both front and rear brakes will prevent skidding and maintain traction, especially on steep descents. Cornering skills, such as looking through the turn, leaning the bike (not your body), and maintaining consistent speed, are essential for navigating berms and switchbacks. Riders should also practice riding over small obstacles, like roots or rocks, and learn to lift the front wheel (a basic front-wheel lift or manual) to handle trail features smoothly.
While formal training isn’t mandatory, taking a beginner lesson or skills clinic can fast-track your confidence and help you avoid common mistakes on your first park day.

What do the trail colors mean?
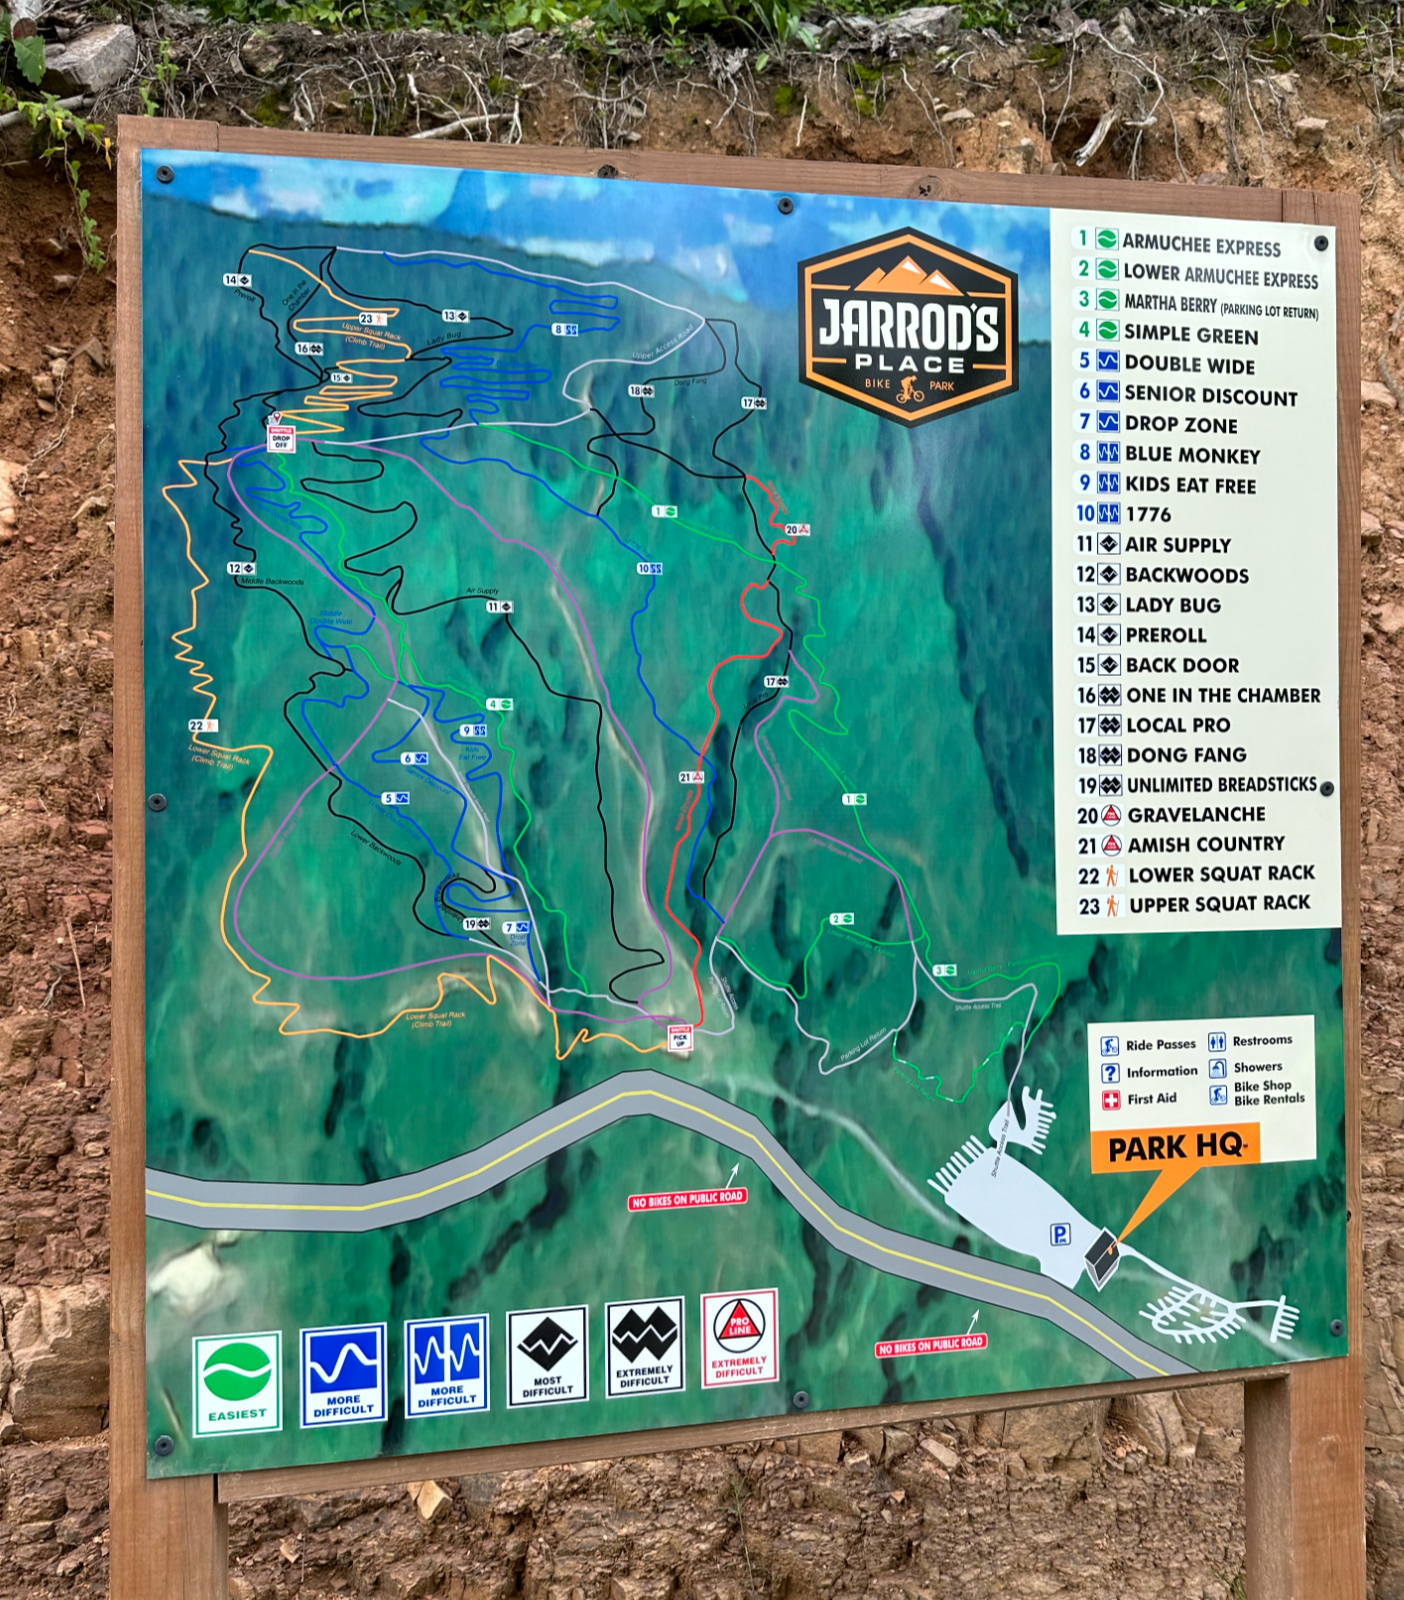
Downhill bike parks use a color-coded trail system—similar to ski resorts—to indicate the difficulty of each run, helping riders choose trails that match their skill level. Green trails are beginner-friendly and feature smooth, wide paths with gentle grades, ideal for first-timers learning basic handling and braking. Blue trails offer a step up in difficulty, with moderate features like small jumps, rollers, berms, and steeper sections—perfect for progressing riders to gain confidence. Black trails are advanced, with technical terrain, larger jumps, tighter corners, and rougher, steeper descents that demand solid bike control and experience. Red, Orange or Pro-Line trails (sometimes marked with a red symbol or a double black diamond) are built for expert riders and often include mandatory gap jumps, big drops, and highly technical features that require advanced skills and a confident, committed riding style. Choosing the right trail color for your riding skills and goals is key to staying safe and having fun, especially on your first day in the park.
Essential gear for your first ride
When riding at a downhill bike park, proper protective gear is essential for safety and confidence on the trails. A full-face helmet is strongly recommended—even required at many parks—as it offers crucial protection for your jaw and face in the event of a crash. Knee, shin and elbow pads provide impact protection during falls and help prevent scrapes and bruises on rough terrain. Many riders also wear gloves for better grip and to protect their hands, and sturdy, flat-soled mountain bike shoes (ideally with a sticky rubber sole) for better pedal control and foot protection. For clothing, opt for moisture-wicking jerseys and durable shorts or pants made for mountain biking—they offer breathability, abrasion resistance, and flexibility. Layering with a lightweight jacket or base layer is helpful in cooler mountain conditions, and a hydration pack or hip pack is great for carrying water, snacks, tools, and a small first-aid kit. Wearing the right gear can make a huge difference in both comfort and confidence.
What kind of pass do I need?
When planning your trip to a downhill bike park, it’s helpful to understand the different types of passes available, each offering various levels of access and value. Most parks offer day passes, typically ranging from $40 to $80, which are ideal for one-off visits or first-timers. For those who plan to ride frequently, a season pass to a specific park can offer significant savings—usually priced between $300 and $600—and may come with benefits like early lift access, discounts on food and retail, or access to nearby partner parks. Some ski resort-based bike parks are also affiliated with national pass programs like the IKON Pass or EPIC Pass, which may include limited summer bike park access as a bonus, depending on the pass tier and location.
A newer option gaining popularity in the mountain bike community is the LOAM Pass, a multi-park summer pass that grants riders access to a network of independently operated bike parks, often at a better value than purchasing individual day passes. The LOAM Pass is ideal for riders who like to explore multiple parks across a region throughout the season. Always be sure to check the specific access details and blackout dates for any pass before purchasing, especially during holidays or major events.
Popular bike parks to explore
If you're looking to plan your first adventure, here are some renowned bike parks to consider:
Location | Bike Park Name | Highlights |
|---|---|---|
Vermont | Vermont’s largest bike park with lift-served trails ranging from beginner flow to advanced tech, spread across three mountain areas. | |
Central Virginia | A compact but growing park in Virginia offering lift-served downhill trails, jump lines, and an excellent introduction to gravity riding. | |
Eastern Tennessee | Tennessee’s premier gravity destination, known for steep, rocky, technical trails and year-round riding on private land. | |
Western North Carolina | A newer, purpose-built park in North Carolina featuring shuttle-accessed trails, machine-built jump lines, and expert-only features. | |
North Georgia | A rider-built park in Georgia known for big jumps, progressive freeride lines, and a strong community vibe. | |
Colorado | Colorado’s high-elevation bike park with scenic flow trails, challenging descents, and a mix of alpine terrain and aspen groves. | |
California | California’s largest bike park with high-altitude terrain, pumice soil, and nearly 80 miles of trails across expansive mountain landscapes. | |
Pacific Northwest | The world’s most iconic bike park, offering over 80 miles of trails from flow lines to pro-level tech in a stunning alpine setting. |
Whether you're a seasoned trail rider or brand new to downhill biking, visiting a bike park for the first time is an exciting step into the world of gravity-fueled riding. With a little preparation—from understanding the types of bikes and trails, to gearing up with the right equipment and choosing the best pass option—you’ll set yourself up for a safe and thrilling experience. Downhill parks are designed to be welcoming to all skill levels, so don’t be intimidated. Start small, build your skills, and most importantly, have fun.
Key Takeaways:
Choose the right bike: Enduro for versatility, downhill for maximum speed and control.
Learn the basics: Practice braking, body position, and cornering before your first park day.
Understand trail colors: Green = beginner, Blue = intermediate, Black/Red = advanced/pro.
Wear proper gear: Full-face helmet, pads, gloves, and durable clothing are essential.
Pick the right pass: Day pass for one-off visits, season or LOAM Pass for regular riders.
No matter where you ride, downhill biking is about progression, confidence, and enjoying the ride. \
Connecting through adventure
Adventure Operations Group (AOG) invites you to connect with our community of beyond normal limits adventurers. Our curated travel experiences, apparel, and soon-to-launch exclusive membership program are all designed to elevate your adventures to new levels.
Whether you're gearing up for your first bike park adventure or seeking your next challenge, Adventure Operations Group is here to guide you beyond normal limits. Sign up for our newsletter to stay updated on the latest training tips, stories, gear, and exclusive membership offers. Ready to tailor your own custom mountain bike travel experience?
Contact us today, and let's craft your next unforgettable journey together.
Brad Christian Founder


Comments